2001 3" Body Lift Install
Stage II


Home

Preparations | Stage I | Stage II | Stage III | Stage IV | Bumpers | 2001 Bumper | Conclusion


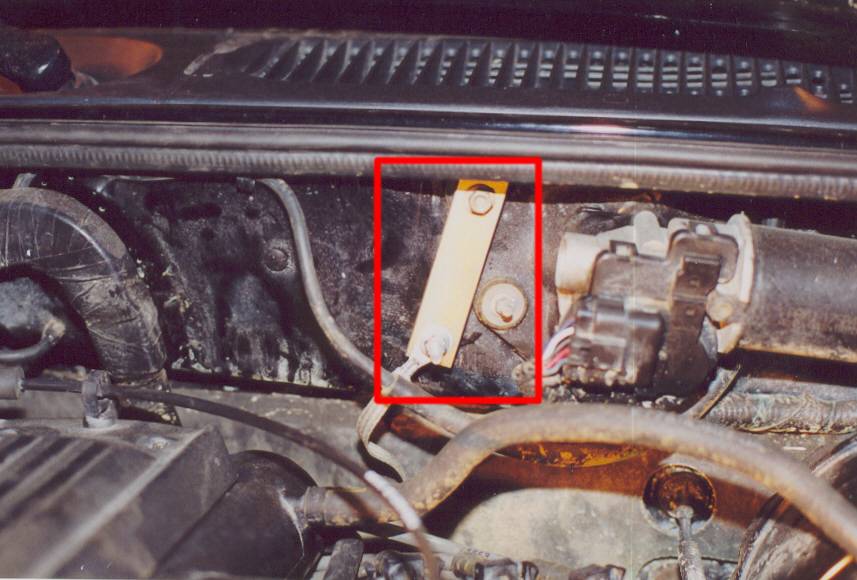
Disconnect the ground straps from the frame on either side. There are only two and are below the driver's seat.(approx.) *Save the screws.

Included in your kit are three 3" flat drop brackets with a stud on one end and a hole on the other. Use one for the ground strap in the engine compartment and the other two will be used to drop the radiator.

There is a ground wire on the drivers side firewall over the left cylinder bank. Remove the nut and ground. Install the drop bracket on the firewall with the stock nut. Use the nut and washer supplied to secure the ground strap.

mudaction.jpg


Find the tranny shift cable and remove it from any clips.

Sorry, no photos, couldn't get a good shot.

4WD models-Disconnect the motor cable and leave it for now. If there is a strap holding it, remove the strap.

Remove the intake hose from the filter box and manifold. Disconnect the MAP sensor and lay the entire assembly ON THE GROUND AND AWAY FROM YOUR WORK AREA. This way it cannot fall or be accidentally kicked.

Remove the bolts from the top radiator core mounts. *Save the bolts. Lift up on the radiator and shift it to the left out of the lower core seat. This may be a bit tricky because it is tight quarters, but it can be done in a few minutes. Slide it to the right and remove it from the left lower core seat. Remove the rubber from both of the bottom core seats. *Save these.

On the drivers upper shock mount are three brake lines. Remove these from the clips. The clips are a pain in the ass, but with a little patience you'll get them out.

There is a sheet metal cover on the inside of the drivers side frame rail. You will see it from the engine compartment. Check to see if you have to remove it and unhook some brake lines. I didn't have to do this, but I cannot speak for 98-00 models.

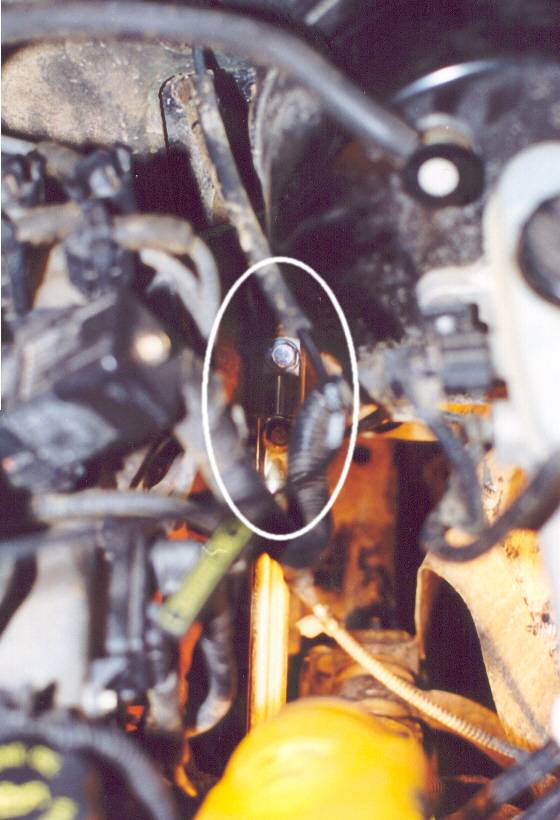
Remove the steering shaft bolt and slide down the lower steering shaft. *Save the bolt. Test fit the steering adapter on both the upper and lower shafts. If it doesn't fit the first time, turn it 180 and try again. I found it easier to install the adapter on the lower shaft first. Install the stock bolt. USE THREADLOCK. Slide the lower shaft onto the upper shaft and install the supplied nut, bolt and washer. USE THREADLOCK.

So far I haven't had any steering problems. It doesn't bind at all and I was pretty dang excited about it too.

NEXT


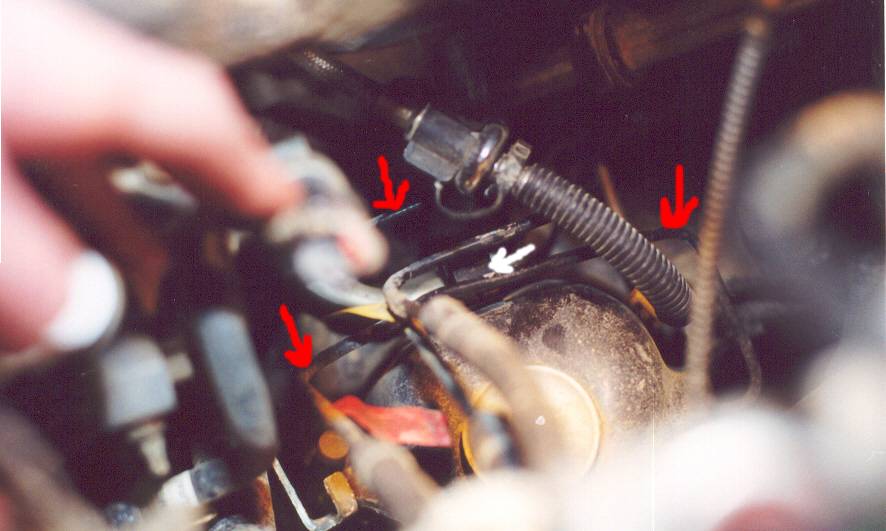
Red arrows poiont to the three seperate lines. White is the bracket.